第一个SpringBoot程序
官方提供了一个快速生成的网站, IDEA集成了这个网站
- 可以在官网直接下载后, 导入IDEA开发
- 直接使用IDEA创建一个SpringBoot项目(一般开发直接在IDEA中创建)
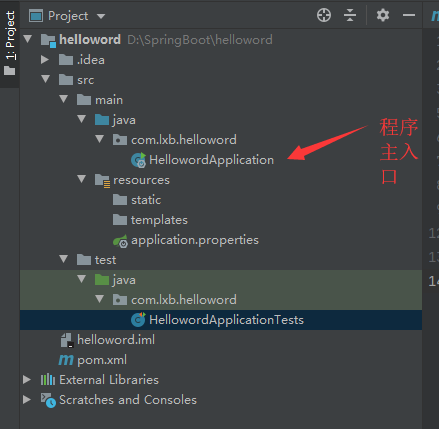
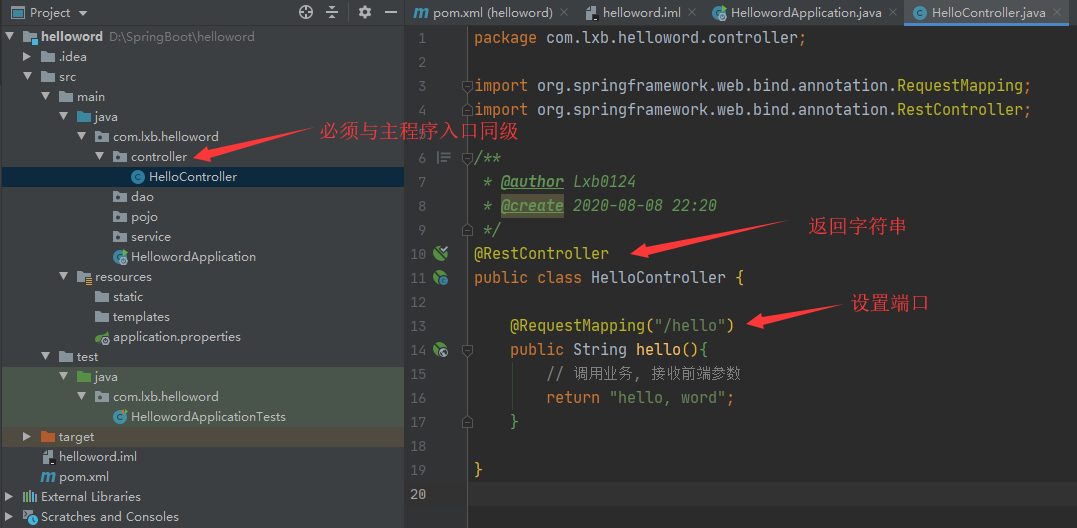
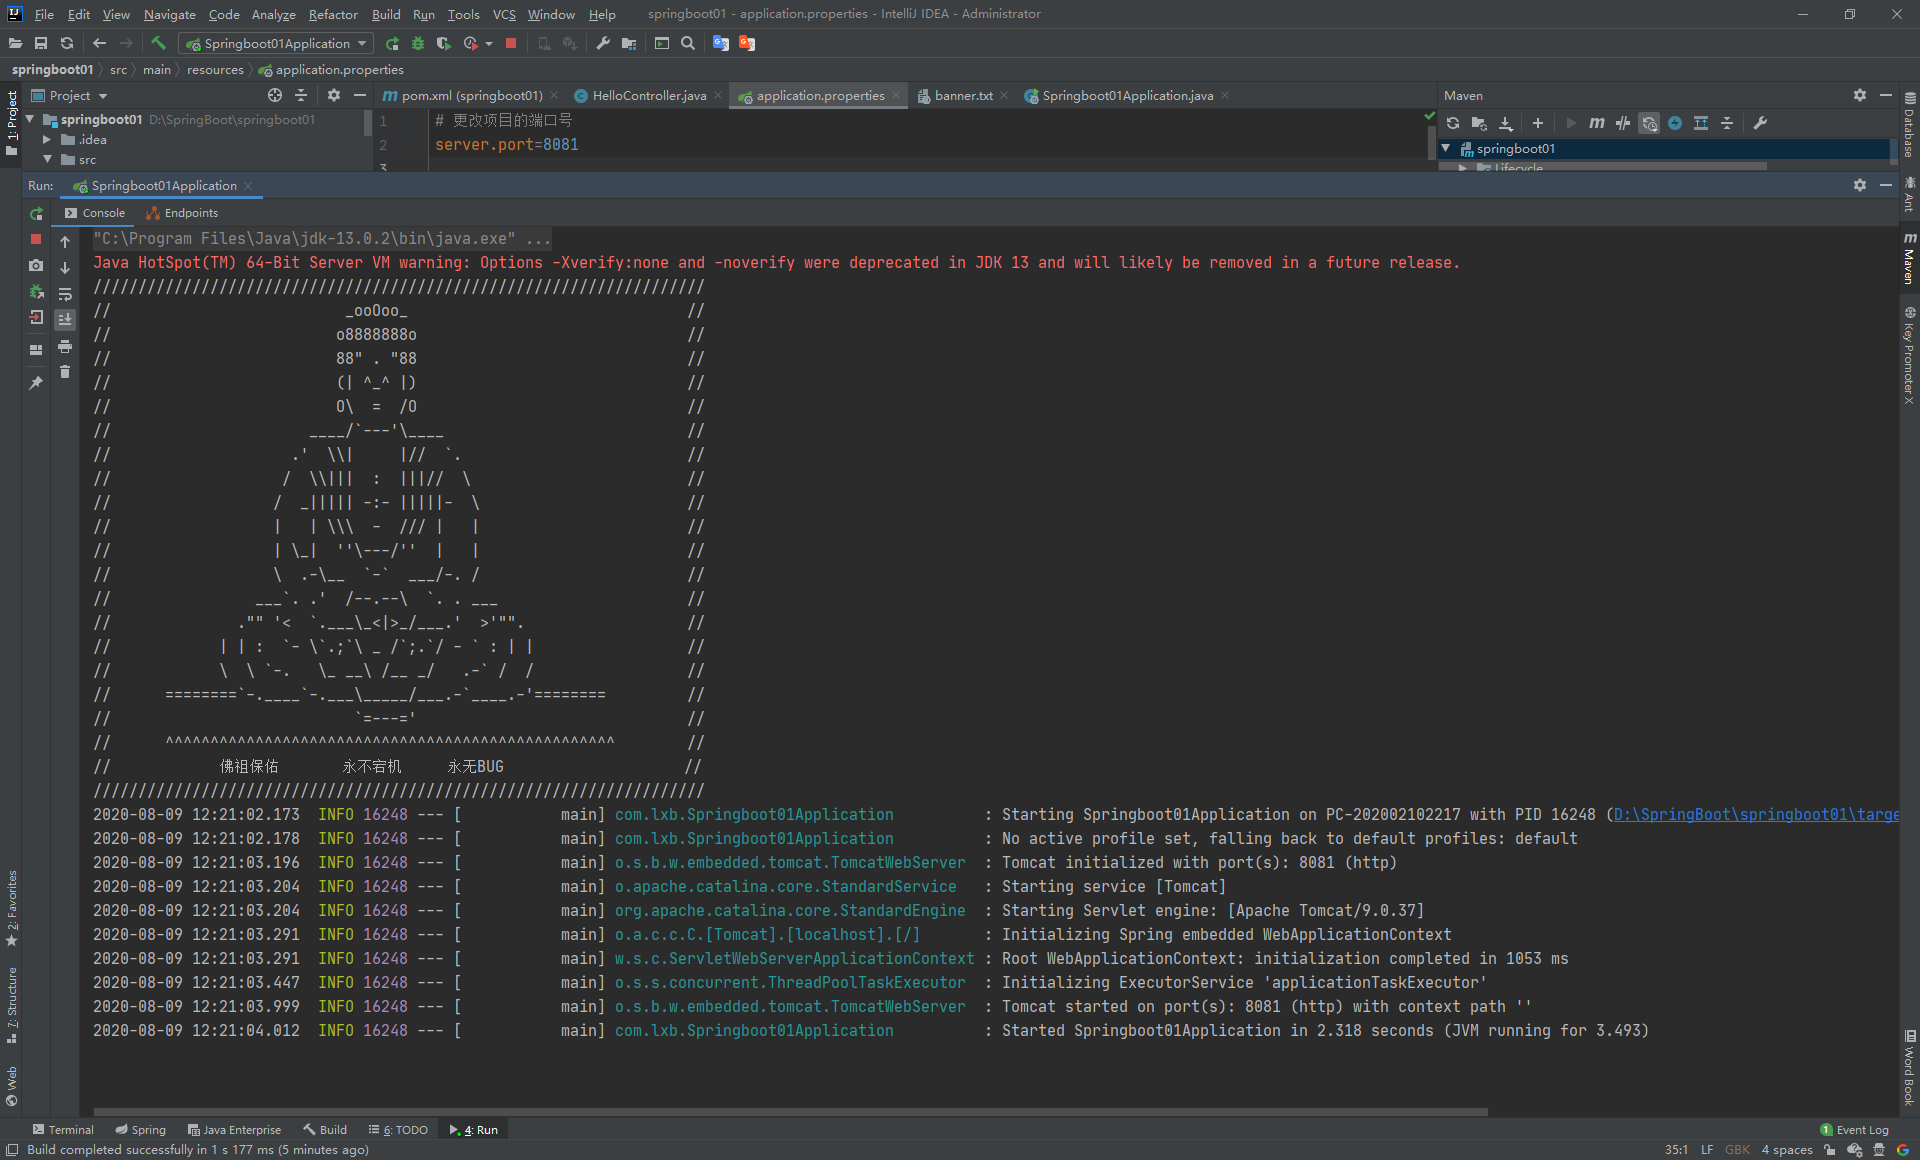
程序的结构为:
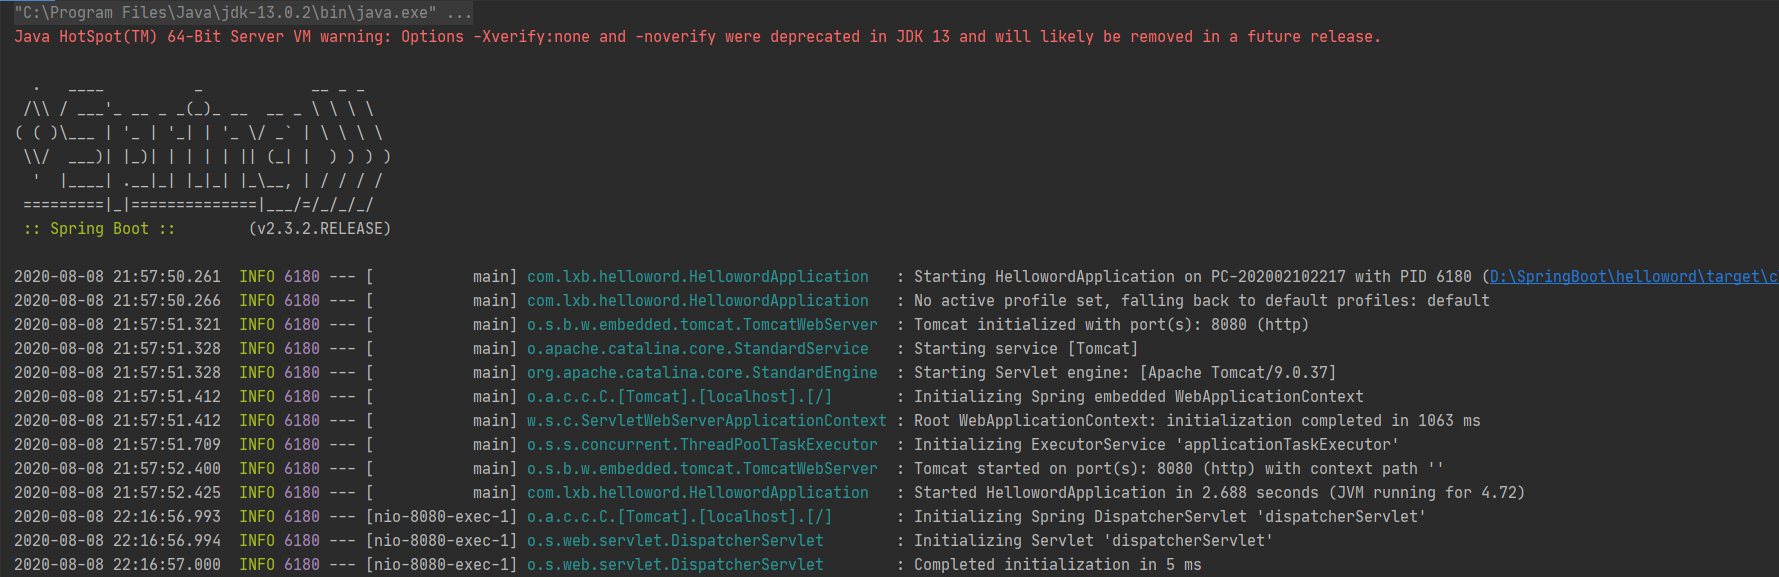
点击运行之后的输出为:
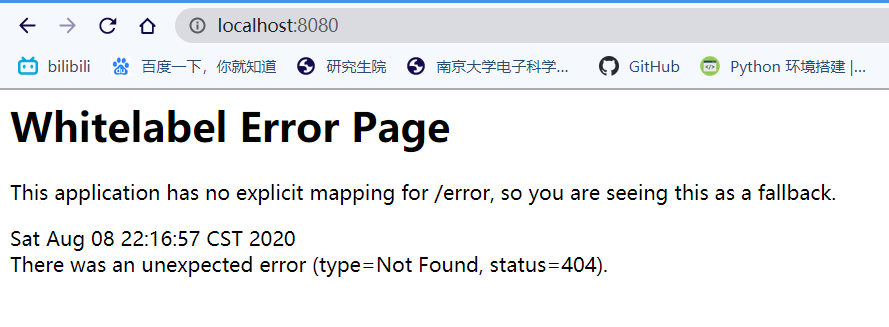
然后从浏览器打开8080端口:
下面开始写一些接口实现web操作:
创建包, 然后写之前SpringMVC中经常写的controller类
运行之后在浏览器中查看

*卧槽!!!Spring没配置!!! web.xml没配置!!!! Tomcat没配置!!!! *
主入口处的@SpringBootApplication 注解点进去之后发现这本质还是一个@Componet
再来看看porm.xml文件, 发现父项目的信息为:
1 | <parent> |
综合这两点, 得出本质上还是一个Spring实现
然后看依赖部分, 这个web依赖中集成了Tomcat服务器, dispatcherServlet, xml 等等等等, 都不需要我们再配置
1 | <dependencies> |
使用Maven的打包工具, 可以将当前项目打包(jar)
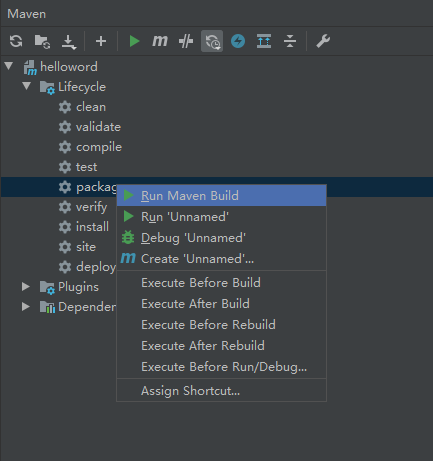
这里要注意Java编译器版本
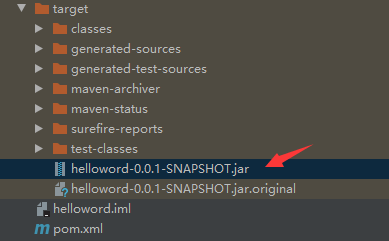
打包成功后可以看到输出目录中出现了打包好的jar包
在自带的springboot配置文件中可以自定义多个选项, 比如自定义端口号:
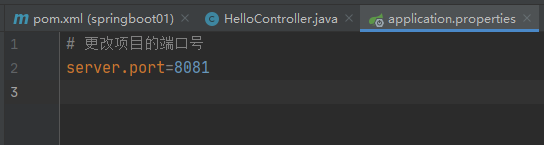
修改成功后:

*小彩蛋: *
输出端口的图片可以自定义, 百度进入bootschool网站挑选一个有趣的图片, 然后在资源目录中新建一个banner.txt的文件, 把图片复制进去, 然后再运行程序:
原理初探
自动装配
porm.xml:
- spring-boot-dependencies: 核心依赖在父工程中
- 我们写或者引入一些SpringBoot依赖的时候, 不需要指定版本, 就因为有这些仓库
启动器:
<dependency> <groupId>org.springframework.boot</groupId> <artifactId>spring-boot-starter</artifactId> </dependency>1
2
3
4
5
6
7
8
9
10
11
12
13
14
15
16
17
18
19
20
说白了就是Springboot的启动场景
比如spring-boot-starter-web, 会帮我们自动导入web环境所有的依赖
* springboot会将所有的功能场景, 都变成一个个的启动器
* 要使用什么功能, 找到对应的启动器即可
主程序:
```java
@SpringBootApplication
public class Springboot01Application {
public static void main(String[] args) {
SpringApplication.run(Springboot01Application.class, args);
}
}注解@SpringBootApplication 标志着这是一个Springboot类
Springboot所有的自动配置都在启动的时候扫描并加载: spring.factories 所有的自动配置类都在这里面, 但是不一定生效, 要判断条件是否成立, 只要导入了对应的start, 就有对应的启动器, 自动装配就生效, 进而配置成功.
- Springboot在启动的时候, 从类路径下/META-INF/spring.factories获取指定的值
- 将这些自动配置的类导入容器, 自动配置类就会生效, 帮我们进行自动配置
- 以前我们需要自动配置的东西, 现在Springboot帮我们做了
配置文件
Springboot使用一个全局的配置文件, 配置文件名称是固定的
- application.properties
- 语法结构: key=value
- application.yml
- 语法结构: key: 空格 value
配置文件的作用: 修改Springboot自动配置的默认值, 因为Springboot在底层都给我们自动配置好了
1 | name: lxb |
相比之下, properties文件只能储存键值对
对空格和缩进的要求十分高
可以通过yaml文件实现对象的赋值
首先来看原生的方式:
创建一个对象类
1
2
3
4
5
6
7
8
9
10
11
12
13
14
15
16
17
18
19
20
21
22
23
24
25
26
27
28
29
30
31
32
33
34
35
36
37
38
39
40
41
public class Dog {
("旺财")
private String name;
("3")
private int age;
public Dog() {
}
public Dog(String name, int age) {
this.name = name;
this.age = age;
}
public String getName() {
return name;
}
public void setName(String name) {
this.name = name;
}
public int getAge() {
return age;
}
public void setAge(int age) {
this.age = age;
}
public String toString() {
return "Dog{" +
"name='" + name + '\'' +
", age=" + age +
'}';
}
}然后在测试类中自动装配
1
2
3
4
5
6
7
8
9
10
11
12
class Springboot01ApplicationTests {
private Dog dog;
void contextLoads() {
System.out.println(dog);
}
}通过yml赋值
首先编写一个Person类, 然后添加注解
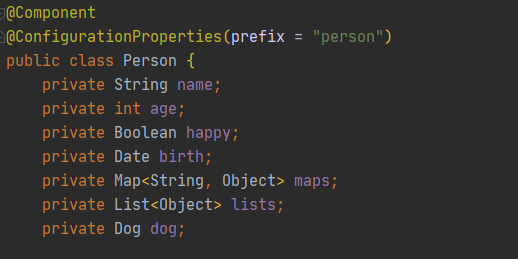
注意这里的第二个注解需要在porm.xml文件中添加依赖和插件:
1 | <dependency> |
在yml文件中进行赋值:
1 | person: |
然后测试:
1 |
|
输出为:

- 也可以通过.properties文件赋值
- 首先创建配置文件xxx.properties
- 在定义的类上方添加注解
@PropertySource(value="classpath:xxx.properties") - 在具体的属性上方添加注解
@Value("${xxx}")取出具体的属性
多环境配置
可以创建多个同级的配置文件, 分别为不同的场景使用, 比如测试环境, 开发环境等等, 为这些环境配置不同的端口或其他属性
在没有申明的情况下, 默认走application.properties中的配置, 如果需要使用其他配置, 可以设置spring.profiles.active=xxx, 可以选择激活哪一个配置文件
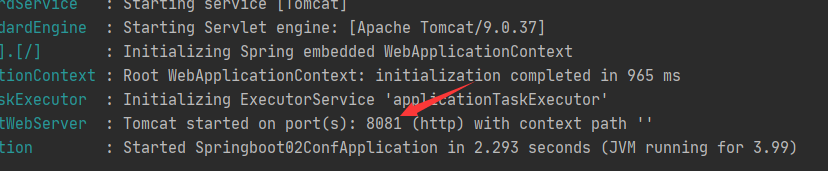
下面直接演示yaml配置文件
1 | server: |
启动服务后, 输出为:
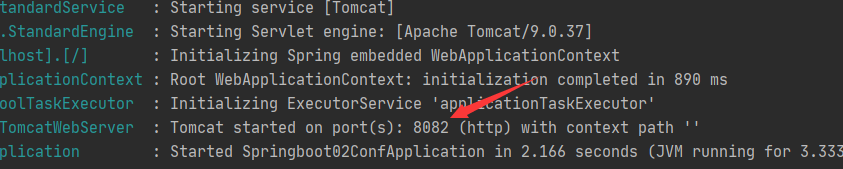
激活dev版本:
1 | server: |
输出为:
如果使用.properties文件进行配置, 需要多个同级文件才能实现这样的效果
可以通过debug: true来查看, 哪些自动配置类生效, 哪些没有生效
1 | debug: true |
Web开发
- xxxAutoConfiguration: 向容器中自动配置组件
- xxxProperties: 自动配置类, 装配配置文件中自定义的一些内容
静态资源引入
- 通过webjars
localhost:8080/webjars/ - public, static, /**, resources 目录下都可以检测到
localhost:8080/
优先级为:
resource > static(默认)>public
在默认的资源目录下, 创建一个index.html页面, 系统会将它视作工程的首页.
thymeleaf
首先在porm.xml中引入依赖
1
2
3
4
5
6
7
8
9
10<dependency>
<groupId>net.sourceforge.nekohtml</groupId>
<artifactId>nekohtml</artifactId>
<version>1.9.22</version>
</dependency>
<!--解析html包-->
<dependency>
<groupId>org.springframework.boot</groupId>
<artifactId>spring-boot-starter-thymeleaf</artifactId>
</dependency>在
/templates目录下编写html页面一些简单语法
Simple expressions:
- Variable Expressions:
${...} - Selection Variable Expressions:
*{...} - Message Expressions:
#{...} - Link URL Expressions:
@{...} - Fragment Expressions:
~{...}
- Variable Expressions:
MVC配置
我们可以自定义一个MVC配置类, 在这类中可以编写视图解析器或者国际化组件等, 从而绕开springboot默认的各种组件
如果要自定义MVC配置类, 首先需要实现WebMvcConfigurer接口, 标明@Configuration注解, 并且不能带有@EnableWebMvc注解!!!
在SpringMVC阶段实现页面跳转是写Controller实现, 现在直接在自定义配置类中实现即可
1 |
|
这样就能实现在localhost:8080/地址下或者localhost:8080/index.html地址下访问index.html页面
首页配置
所有的静态资源都要用thymeleaf接管
首先引入命名空间:
1 | <html lang="en" xmlns:th="http://www.thymeleaf.org"> |
用thymeleaf接管所有的本地资源:
1 | <!-- Bootstrap core CSS --> |
国际化
首先创建一个配置文件收录所有需要国际化的标签
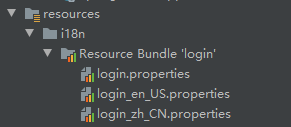
编写需要国际化的内容
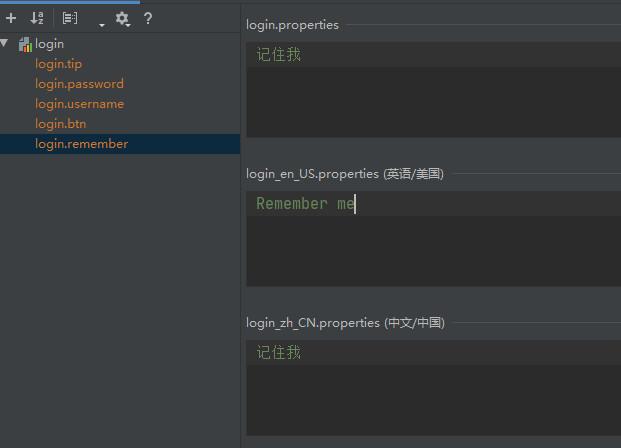
在spring.messages.basename=i18n.login添加该配置文件信息

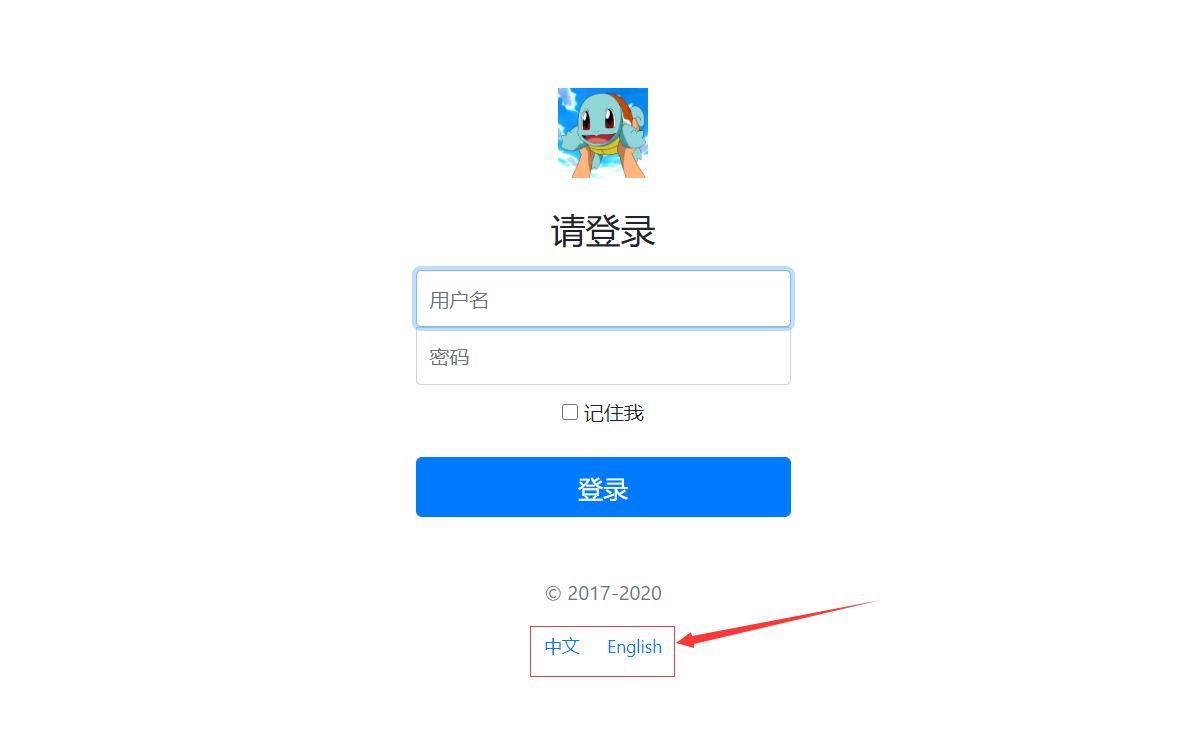
从前端页面发送国际化的请求:

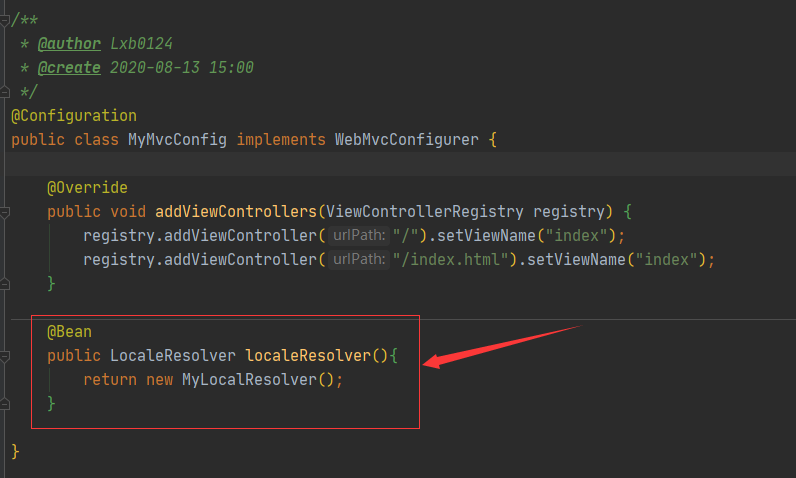
然后编写解析器来解析发送来的国际化请求
1 | public class MyLocalResolver implements LocaleResolver { |
将该本地化解析器组件放入自定义的MVC配置类中
然后在首页就可以进行中英文切换了
CRUD功能
直接看项目代码即可
DATA
连接JDBC
建立与数据库的连接, 需要用到Spring Data框架
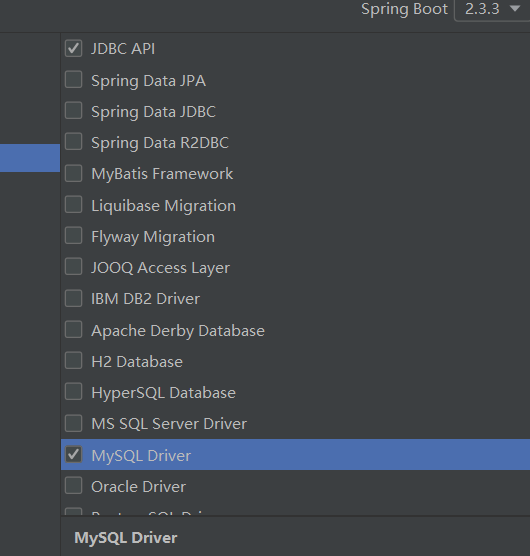
勾选相关的依赖
在填写之前的url后, 尝试查看连接信息,会报出时区异常
1 |
|
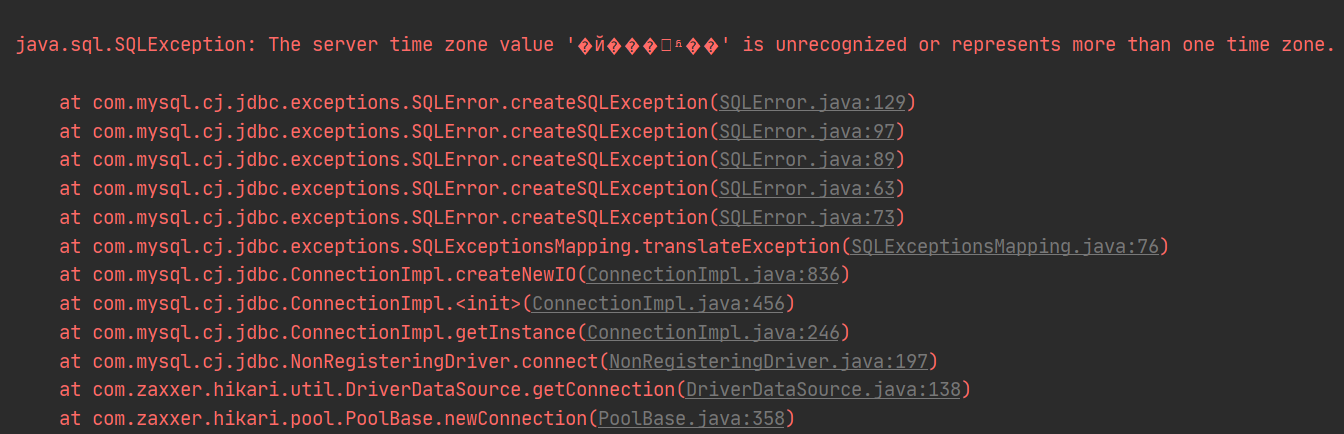
所以, 配置文件应该修改如下:
1 | spring: |
然后就可以正常输出, 说明数据库连接成功:

然后通过SpringBoot自带的JDBCTemplate类就可以进行CRUD操作
1 |
|
在网页可以看到输出为:

自定义数据源->DRUID
Druid是阿里巴巴开源平台上一个数据源连接池实现, 结合了C3P0, DBCP, PROXOO等DB池的优点, 同时加入了日志监控.
首先引入数据源依赖:
1 | <!-- https://mvnrepository.com/artifact/com.alibaba/druid --> |
在yml文件中指定数据源
1 | spring: |
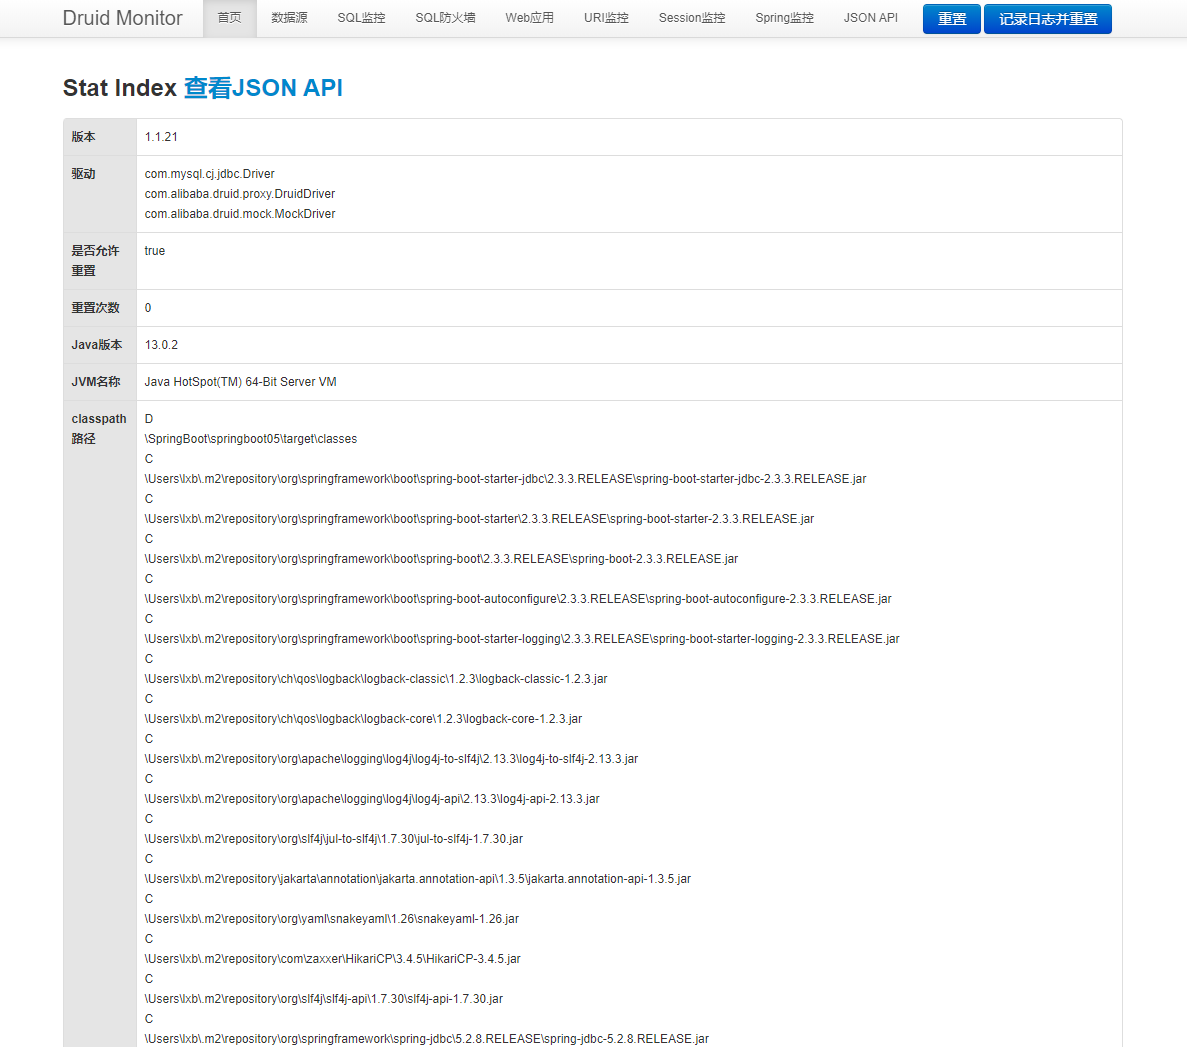
再次测试连接, 查看连接信息:

发现数据源已经从Hikari换成了Druid
接下来配置Druid的配置文件:
1 | spring: |
然后编写配置类: 因为Springboot内置了servlet容器,所以没有web.xml
1 |
|
这里就相当于web.xml文件, 只不过是用注解的形式写出来
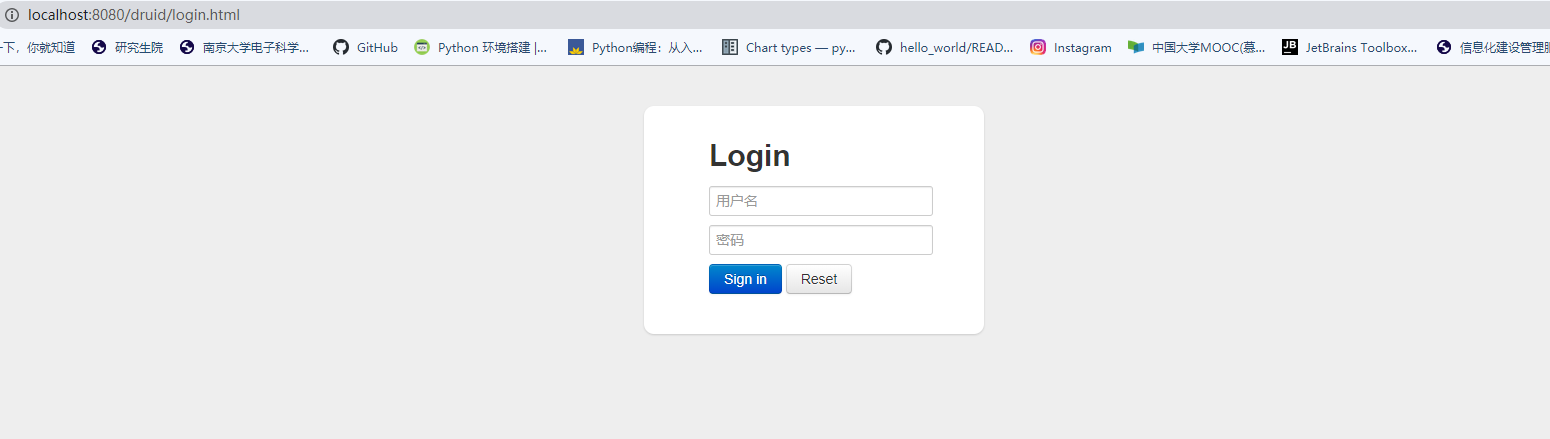
然后在浏览器地址栏输入
1 | http://localhost:8080/druid |
就会显示登录Druid后台监控页面
再打开一个窗口进行数据库查询操作, 然后返回后台监控的SQL监控页面, 可以看到查询信息:

在Druid的配置类中可以添加过滤器
1 |
|
整合Mybatis
首先是整合包
mybatis-spring-boot-starter
1 | <!-- https://mvnrepository.com/artifact/org.mybatis.spring.boot/mybatis-spring-boot-starter --> |
然后来配置数据库信息
1 | spring: |
然后编写mapper接口
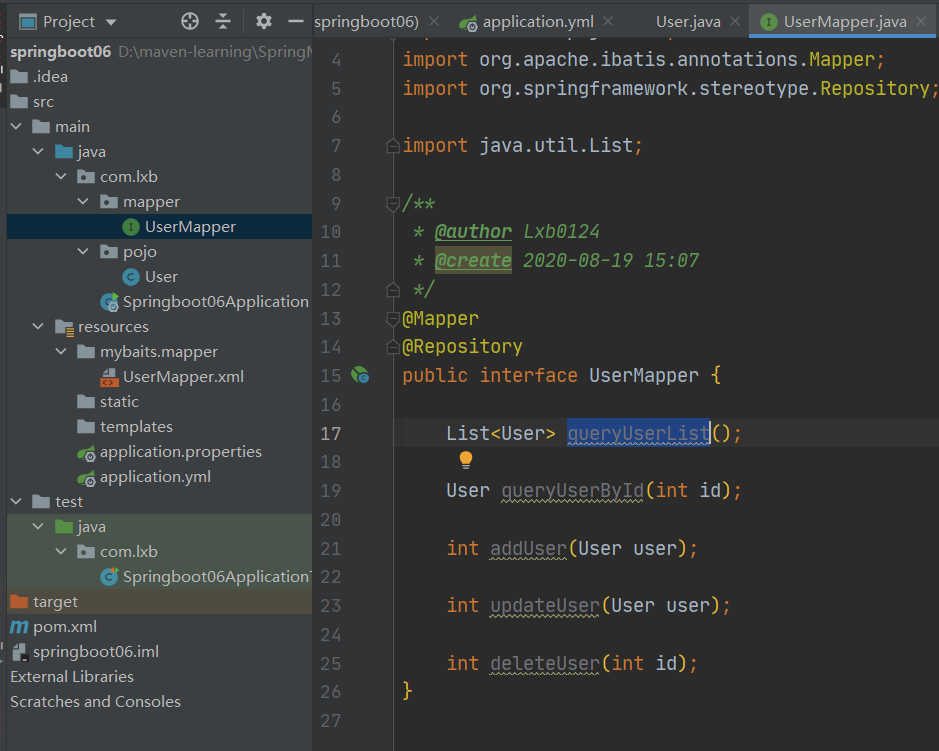
然后去配置具体的xml文件实现接口
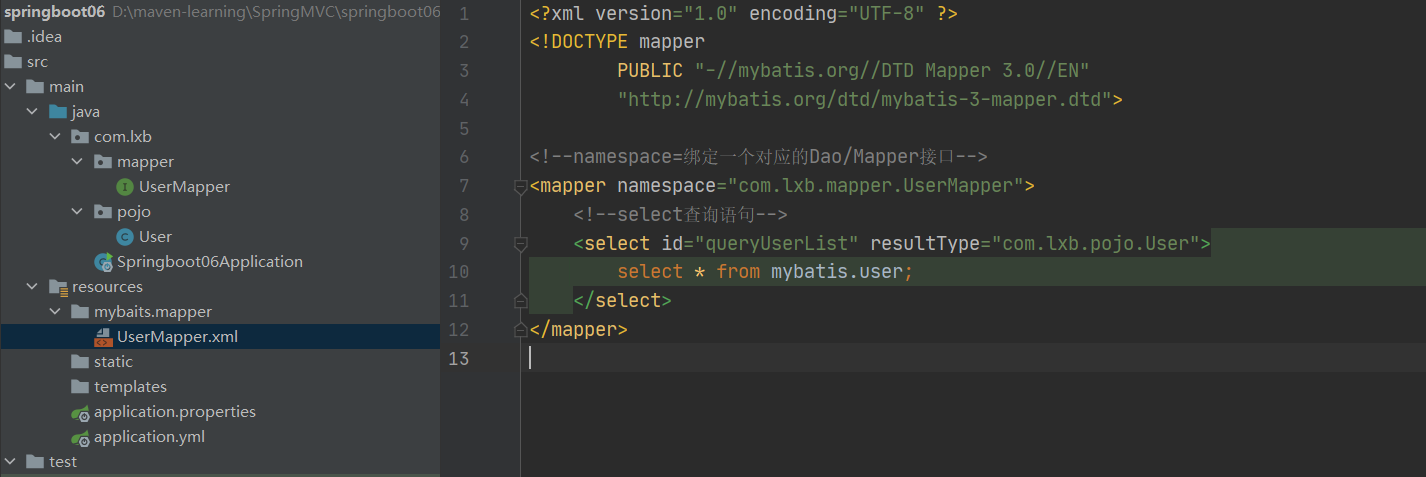
在yml文件中进行映射的绑定, 整合mybatis,
1 | mybatis: |
Shiro
首先新建一个web项目, 搭建最基础的框架, 导入thymeleaf依赖
导入springboot整合的依赖
1 | <dependency> |
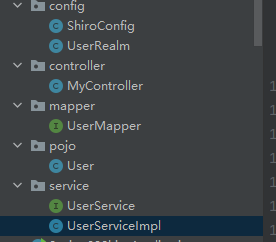
然后编写Config代码, 先自定义一个Realm类, 需要继承AuthorizingRealm
1 | public class UserRealm extends AuthorizingRealm { |
第一个方法为授权, 第二个方法为认证
然后编写核心的配置类
1 |
|
登录拦截
anon:无需认证就可访问
authc: 必须认证了才能访问
user:必须拥有记住我功能才能使用
perm:拥有对某个资源的权限才能访问
role:拥有某个角色权限才能访问
将需要登录拦截的页面写进哈希表中, 并标明拦截等级
在最后要设置登录请求, 意为如果没有权限则要进行登录
1 |
|
编写一个简单的登录页面, 然后传递用户名和密码信息
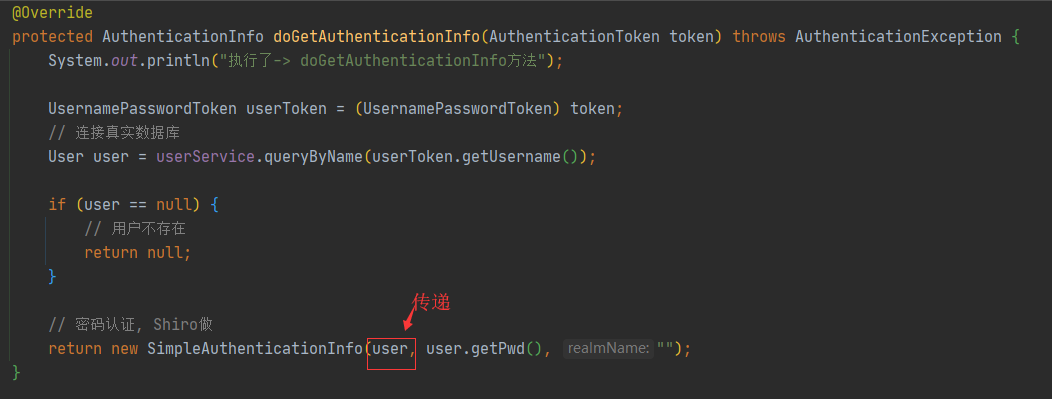
编写相应的Controller类, 对提交的信息进行处理
1 | ("/login") |
其中执行subject.login()方法时, 会跳转到Realm中进行认证处理, 处理的对象就是用户名和密码组成的token
1 |
|
整合Mybatis
至此, 只要连接上数据库, 就能够完成真实的登录拦截操作, 并且可以进一步完善授权的功能
首先导入数据库所需的依赖, 有mybatis整合包, 数据库连接池, 日志, 数据库连接
1 | <dependency> |
配置数据连接池
1 | spring: |
配置Mybatis
1 | mybatis: |
编写相应的pojo类和mapper接口
pojo类就略过, 按照数据库表单进行创建即可, 这里的mapper接口使用注解的方式查询用户对象
1 |
|
然后编写Service层的代码
1 |
|
然后对已经写好的功能进行测试
1 |
|
输出结果正确:
1 | 2020-08-29 17:29:29.792 INFO 5312 --- [ main] com.alibaba.druid.pool.DruidDataSource : {dataSource-1} inited |
在配置文件的mybatis下添加以下配置, 可以打印日志
1 | configuration: |
输出为:
1 | Creating a new SqlSession |
然后将真实数据库连接到Shiro的登录拦截中, 修改realm中的认证代码
1 |
|
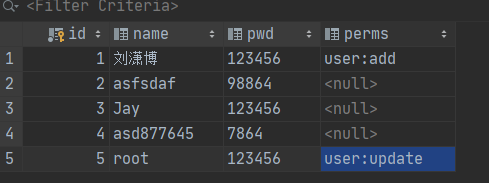
授权
针对不同用户的权限划分出不同功能
在数据库中添加表示权限的列,然后在pojo实体类中添加相应的属性
在配置类中编写授权代码, 指明访问add和update页面需要验证权限
1 |
|
这里是拦截下来, 对拦截下来的用户需要进行处理, 在realm中进行
1 |
|
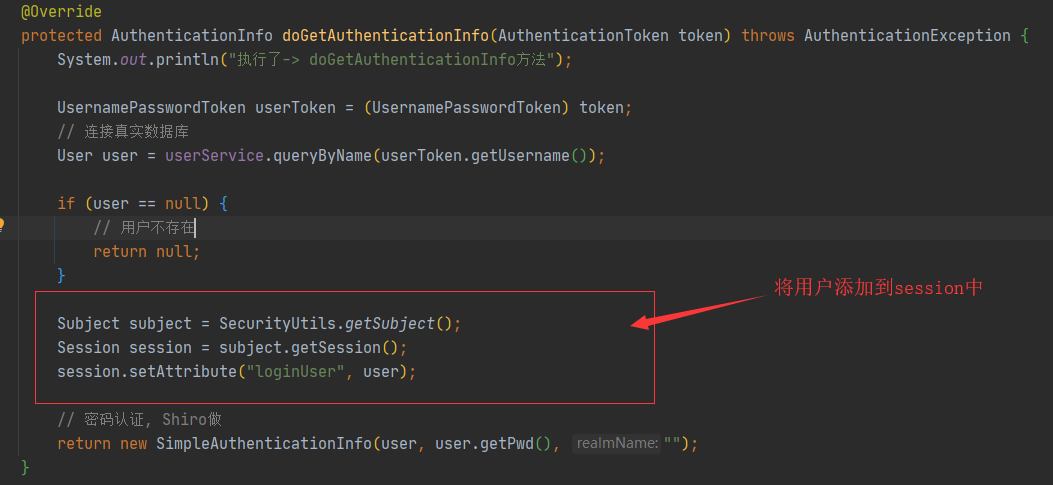
对当前登录的用户进行权限认证, 那么当前用户是怎么传递进来的呢? 答案是在realm的认证过程传递的:
整合Thymeleaf
整合Thymeleaf的目的是为了实现不同权限的用户登录之后显示的内容不同.
首先导入整合的包
1 | <!-- https://mvnrepository.com/artifact/com.github.theborakompanioni/thymeleaf-extras-shiro --> |
在前端验证是否登录还是通过session, 在后端查找到登录的用户后将其添加到session中
在前端页面添加一个判断语句即可
1 | <div th:if="${session.loginUser==null}"> |
任务
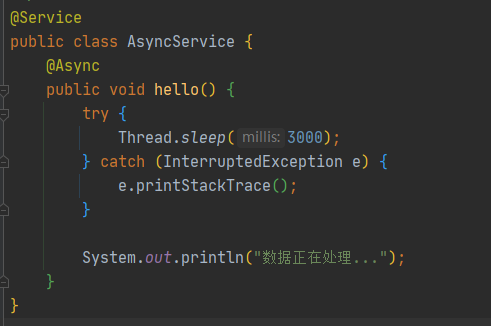
异步任务
在Springboot中可以通过注解@Async开启一个线程
然后在主函数中开启线程开关
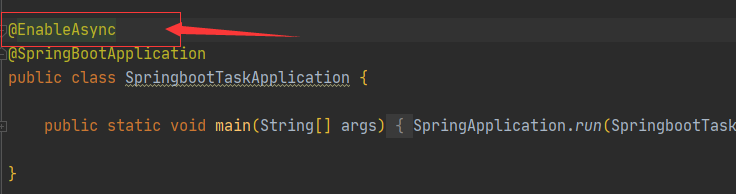
这样配置之后, 调用该服务时系统就会自动开辟一个线程执行该方法
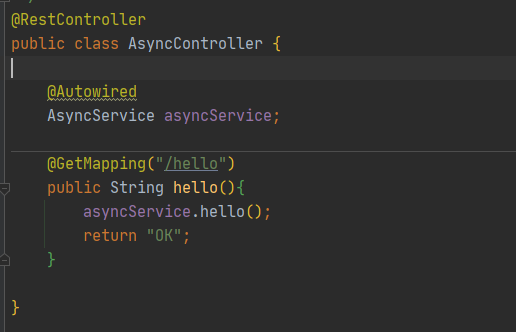
经过测试之后, 如果如果不加该注解, 必须要等到3秒以才能在页面中看到OK, 添加了该注解, 就有另外的线程去执行这3秒的休眠, 返回OK的操作与此无关
定时任务
- TaskScheduler
- TaskExecutor
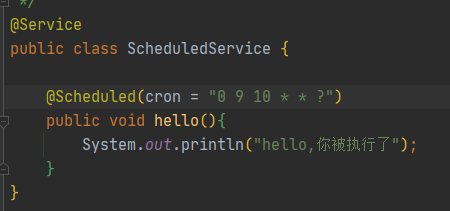
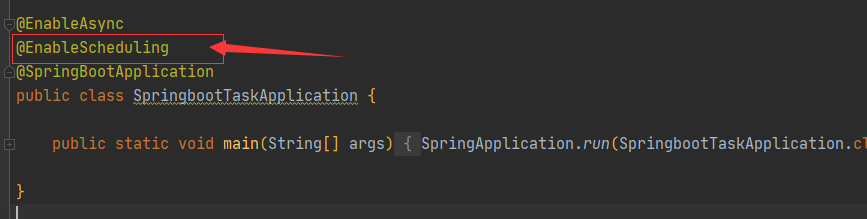
这样就可以给任务添加定时功能了, 其中的cron表达式专门用于调度任务的执行时间
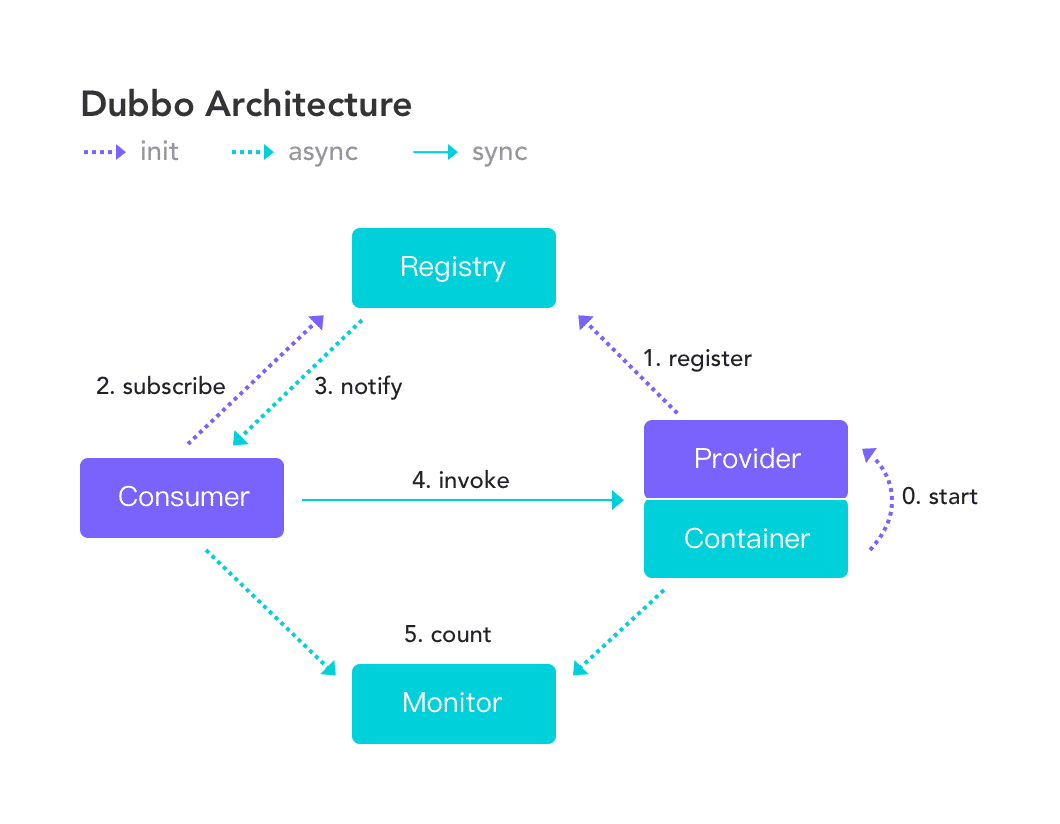
分布式 Dubbo+Zookeeper
Dubbo
一款高性能,轻量级的开源Java RPC框架, 它提供了三大核心功能: 面向接口的远程方法调用, 智能容错和负载均衡, 以及服务自动注册和实现